
If you want to edit, even if only in a minor way, the photos on your smart device (phone or tablet, Android or Apple), two offerings from Google should be tried first. If you’re an Android (Google) device user, it’s a no-brainer.
The Google Photos app will be installed on your device when you get it, and all you need to do is install Snapseed from the Google Play store. If you’re an iOS or iPadOS (Apple) device user then there’s a couple of extra steps you need to do before you can get started.
This guide concentrates on Snapseed. I’ve written about Google Photos previously and I’m providing links to them below. I’ll check to see that things haven’t changed materially since I published these posts …
Getting to grips with Google Photos – needs some updating and revising, and links need to be checked.
More Google Photos – some simple image manipulation – basically sound, but I need to check to see if there are any additional tools added.
Sharing an image (or album) from Google Photos – should be just about up-to-date.
How do you delete photos from Google Photos? – more recent so I’m assuming that it’s good-to-go, but I’ll check of course.
Although Snapseed is intended for use on smart mobile devices, you can install it on either a Windows PC or a Mac, but I have no experience of doing this, so it would be a project you would be taking on ahead of me. So for that reason I’m only looking at the app that you can download either from the Google Play, or Apple App stores.
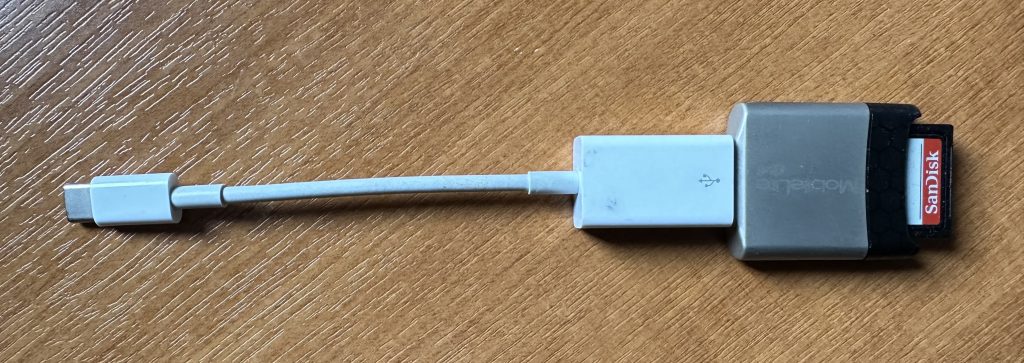
So for camera users (rather than smart phone users), you will first of all need to get the photos onto your device. This could be by a direct cable connection from your camera to your phone, or by transfer using Bluetooth or WiFi, but more likely might be by using a SD-card cable like this one I have for the Apple gear. [It will either have to have a Lightning or a USB-C connector – check first before buying one.]
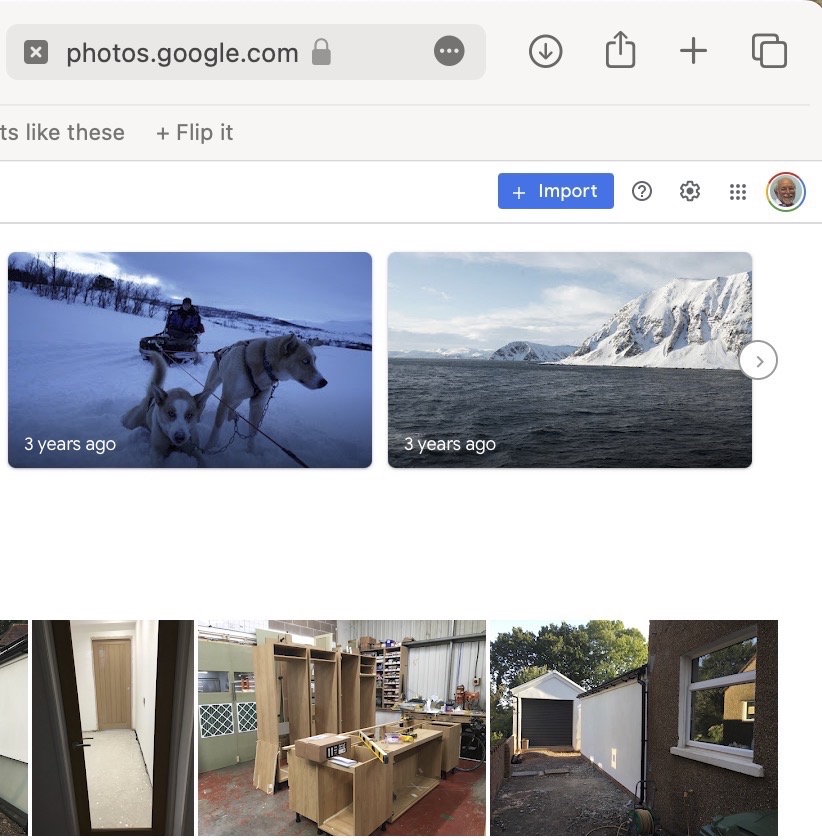
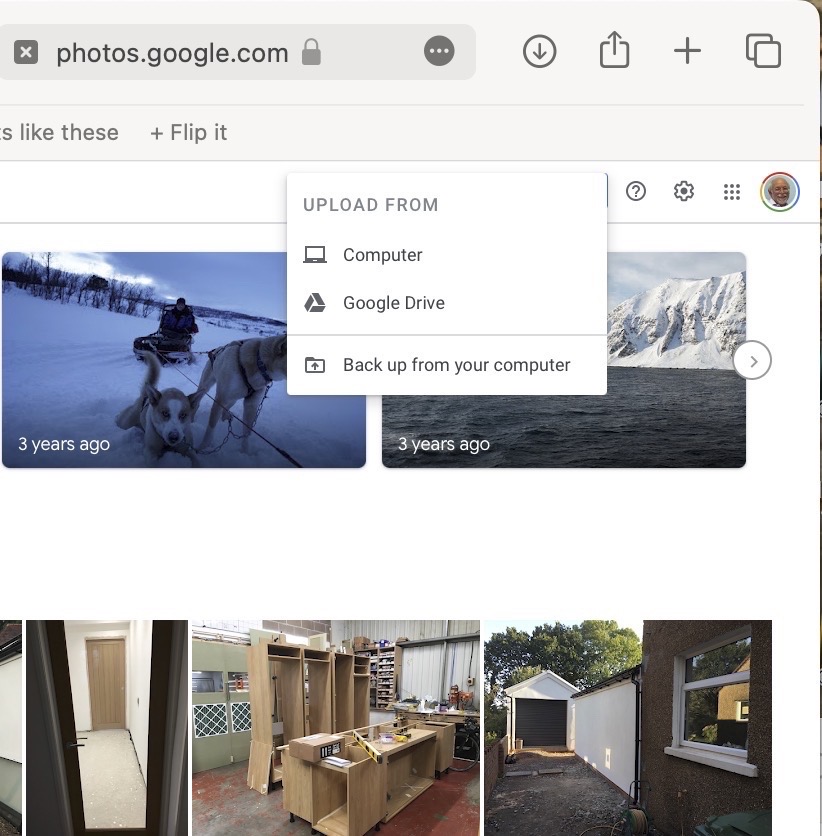
The image(s) thus transferred will be added to your photo library be it Google Photos, or Apple Photos. Another way of adding photos on your computer to your Google Photos would be an Upload to photos.google.com – you will need a Google account to do this. This is how you would do it …
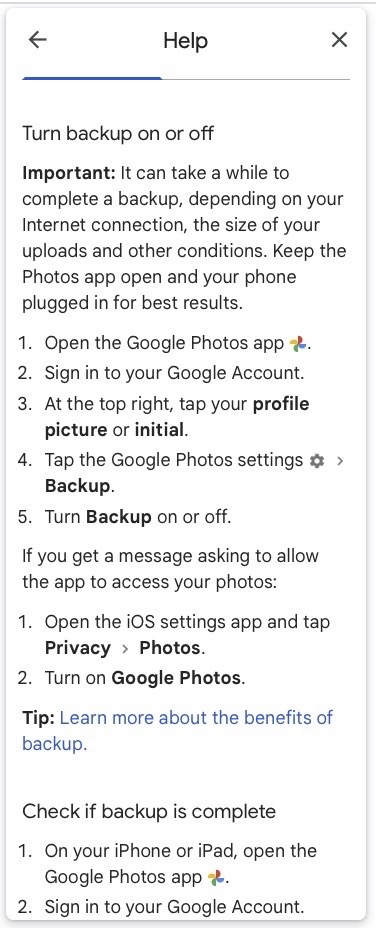
You could decide to use Google Backup to synchronise all your photos from your iPhone (or iPad) to Google Photos as an “easy” way of getting the photos on your Apple device into Google Photos, but this is not necessary to use Snapseed as it can access your Apple Photos directly; so I don’t because I’m already backing-up my photos to iCloud. [I only discovered in November I was also sync’ing to Google Photos, so I stopped doing that then and saved some Google Drive storage, and a whole lot of complications about knowing what was where.] But if you want to synchronise from your Apple Camera to Google, this is how you do it from the Google Photos app on your device …
You should now install the Snapseed app on your device(s) from the Google Play, or Apple App stores, if you haven’t already. If you’re an Apple user you might choose to install the Google Photos app at the same time – although you don’t need it to use Snapseed, but you might just like to compare how it works.
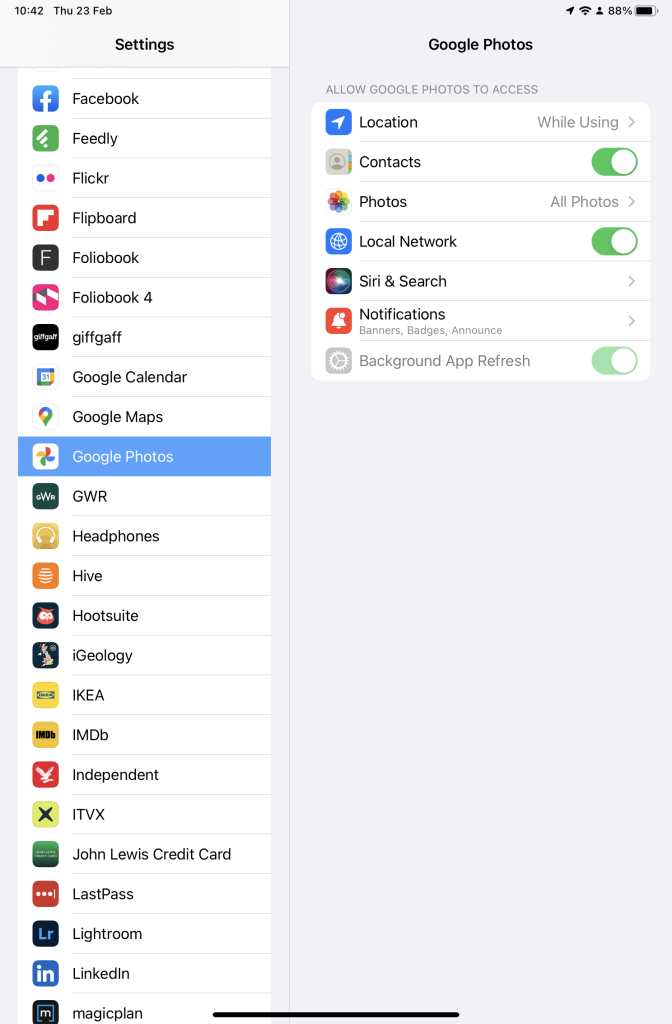
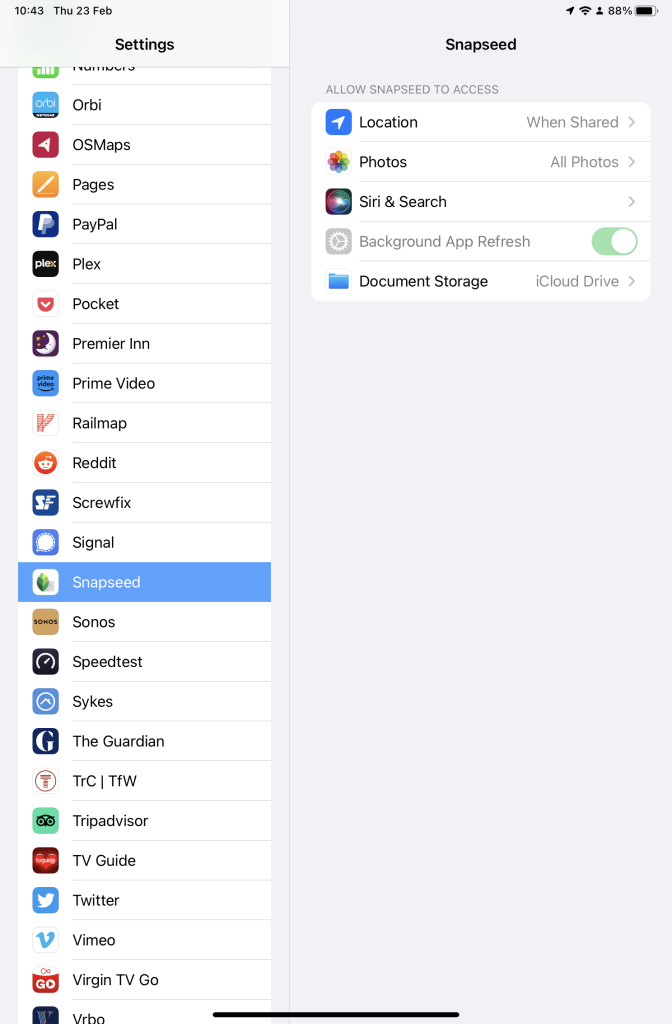
Next up, if you’re an Apple user you need to allow access to your Photo Library to Snapseed (and optionally Google Photos). This will allow both apps (on iOS) to access the Photos in your Camera Roll on your iPhone or iPad.
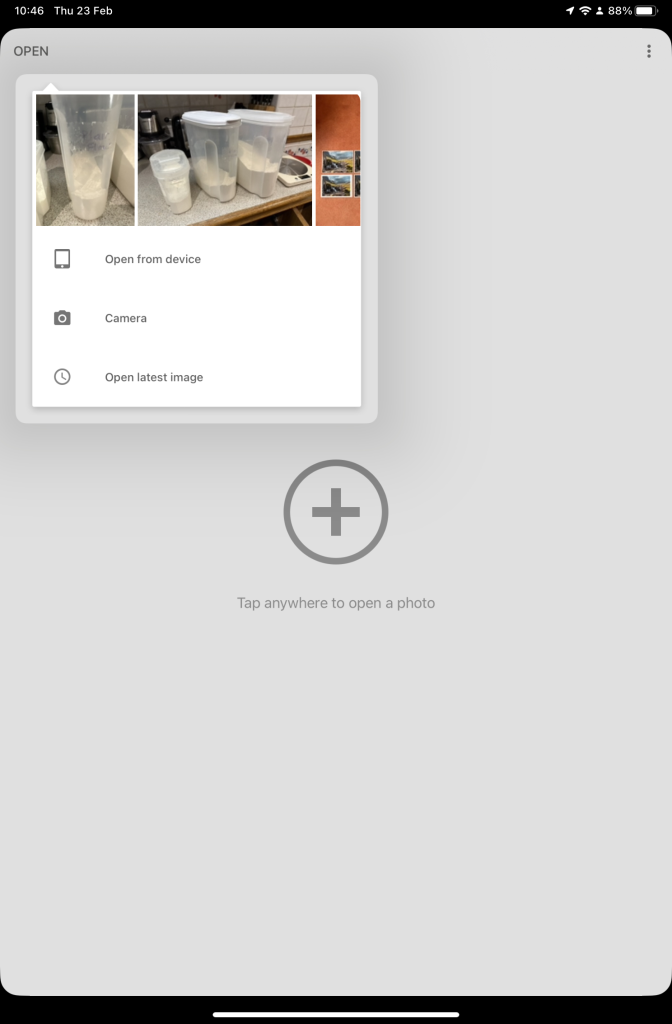
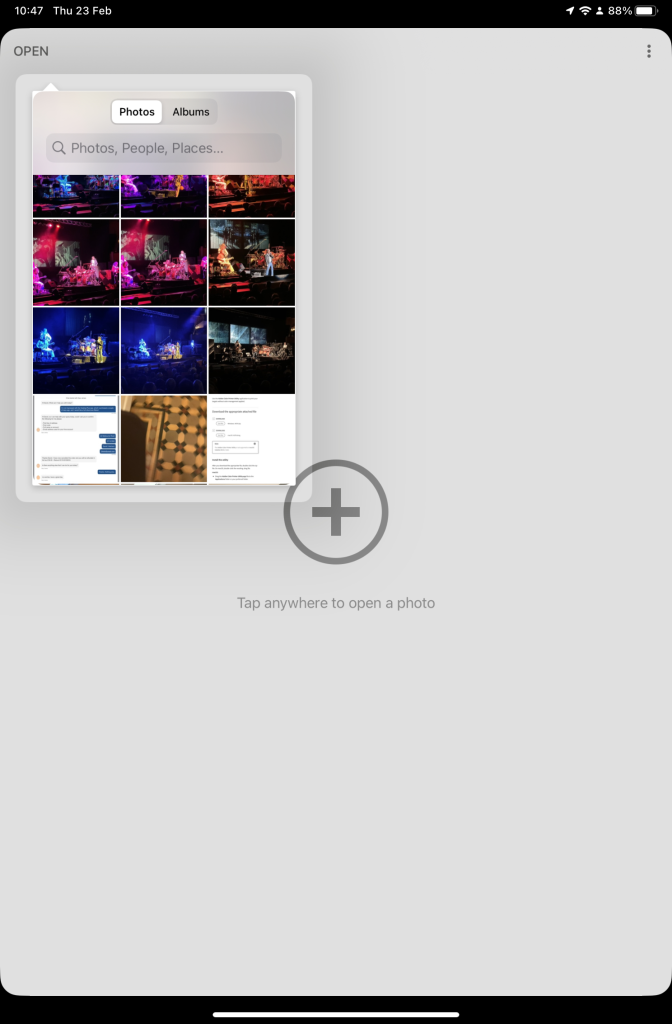
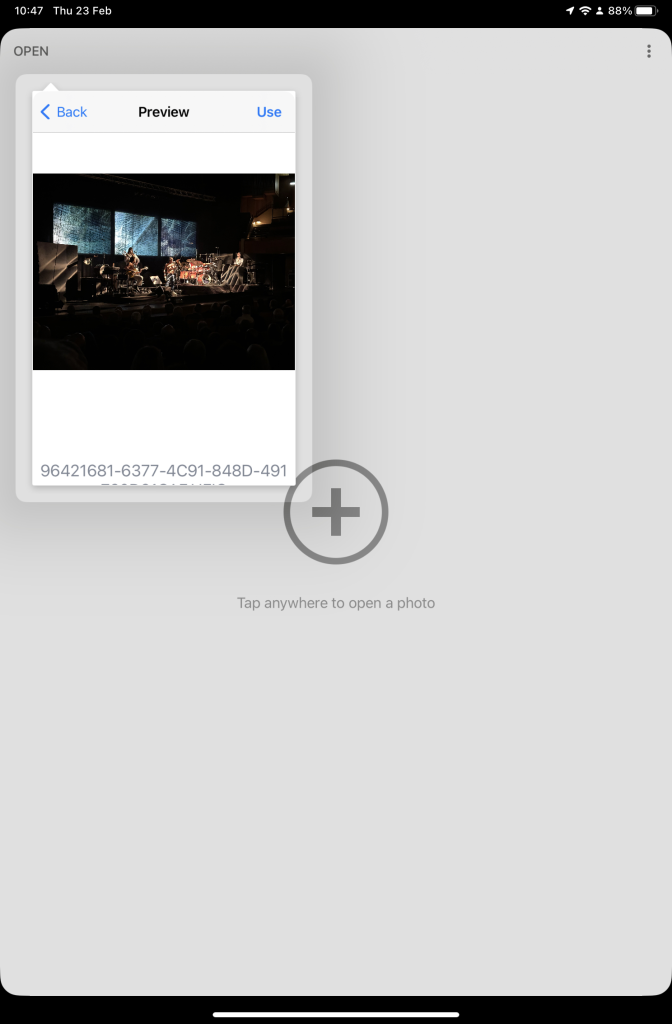
So now your ready to start editing. Open the Snapseed app on your device – you are prompted to Open from device (ie look at the images in your Photo Library), or you can access the camera to take a shot, or Open latest image that you’ve taken. The steps from then on are relatively straightforward and you will have selected the image that you want to Use.
That’s about it. This video (recorded from my screen, hence background noise and rather low audio volume) gives a reasonable introduction on how the Snapseed app works …
Here are some links that you might find of interest:
Complete Guide To Using Snapseed To Edit Your iPhone Photos
How to Edit Photos in Snapseed
Using your Android camera to take photos; but I believe all Android phones have slightly different camera interfaces, so you’re better off researching that for yourself. [NB If you have come across a really good guide, let me know and I’ll add it to the list here.]
How to Use the Camera on an Android Phone: The Basics Explained
Then for the iPhone …
How to use iPhone Camera: A guide for beginners and pros
A Beginners Guide To Incredible iPhone Photography
How To Use The iPhone Camera App To Take Incredible Photos
I hope that helps. Please advise if you come across something that doesn’t quite work for you, it might be my notes!!!