Category: Apple

  • Moving Google Photos to Apple Photos

    Moving Google Photos to Apple Photos

    You’re running out of storage space on the 15Gb integrated – Gmail, Calendar, Drive cloud storage that you got for free. You could of course create another Google account and have another 15Gb, or you could pay Google £24.99 pa for 200Gb – but that’s quite possibly too much storage.

    What if you already have an Apple iCloud account? You might be paying for the iCloud+ 50Gb option which costs you £0.99 pm, or you might consider subscribing to it if you’re not – it’s available for Windows as well as Apple devices. [You might also consider whether it’s worth looking at the Apple One Plan and get Apple Music and Apple TV as well.]

    But what if you have both a free Google account, and an Apple iCloud account? Might it be worthwhile considering moving your Photos to Apple iCloud to leave space on Google cloud for your Gmail, etc.

    Here’s some directions on how to do exactly that …

    Specific instructions on how to transfer photos from Google Photos to Apple iCloud Photos

    The simplest method is Google’s direct transfer service: it copies your Google Photos library straight into iCloud Photos without downloading it first. Your originals remain in Google Photos, so do not delete anything there until you have checked the import.

    Before you start
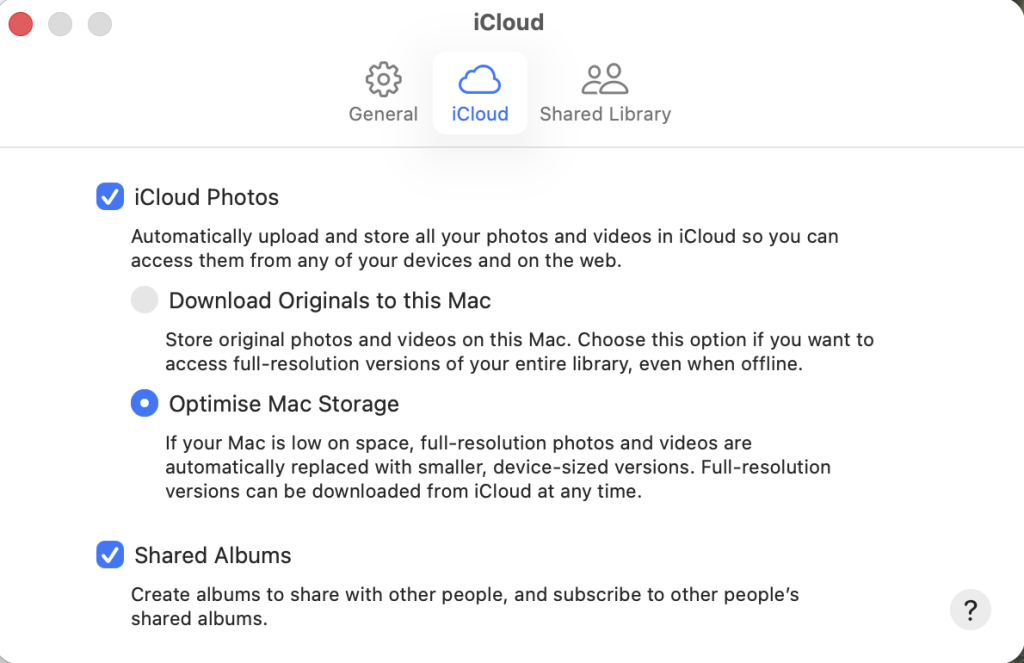
    1. Check iCloud space: Open Settings > your name > iCloud on an iPhone/iPad, or System Settings > your name > iCloud on a Mac, and make sure your iCloud plan has enough free storage for the items you intend to copy.
    2. Enable iCloud Photos: Turn on iCloud Photos (shown as Sync this iPhone on iPhone) and also enable iCloud Drive.

      Choose the option above that you’re most happy with. On your new Mac I guess that storage isn’t a problem.
    3. Temporarily turn off Advanced Data Protection, if enabled: Apple does not allow this import while Advanced Data Protection for iCloud is active. You can re-enable it after the transfer is finished. [This shouldn’t be an issue, as it’s not allowed in the UK.]
    1. Use a personal Apple Account: the service is not available for child accounts or Managed Apple Accounts.

    Start the transfer
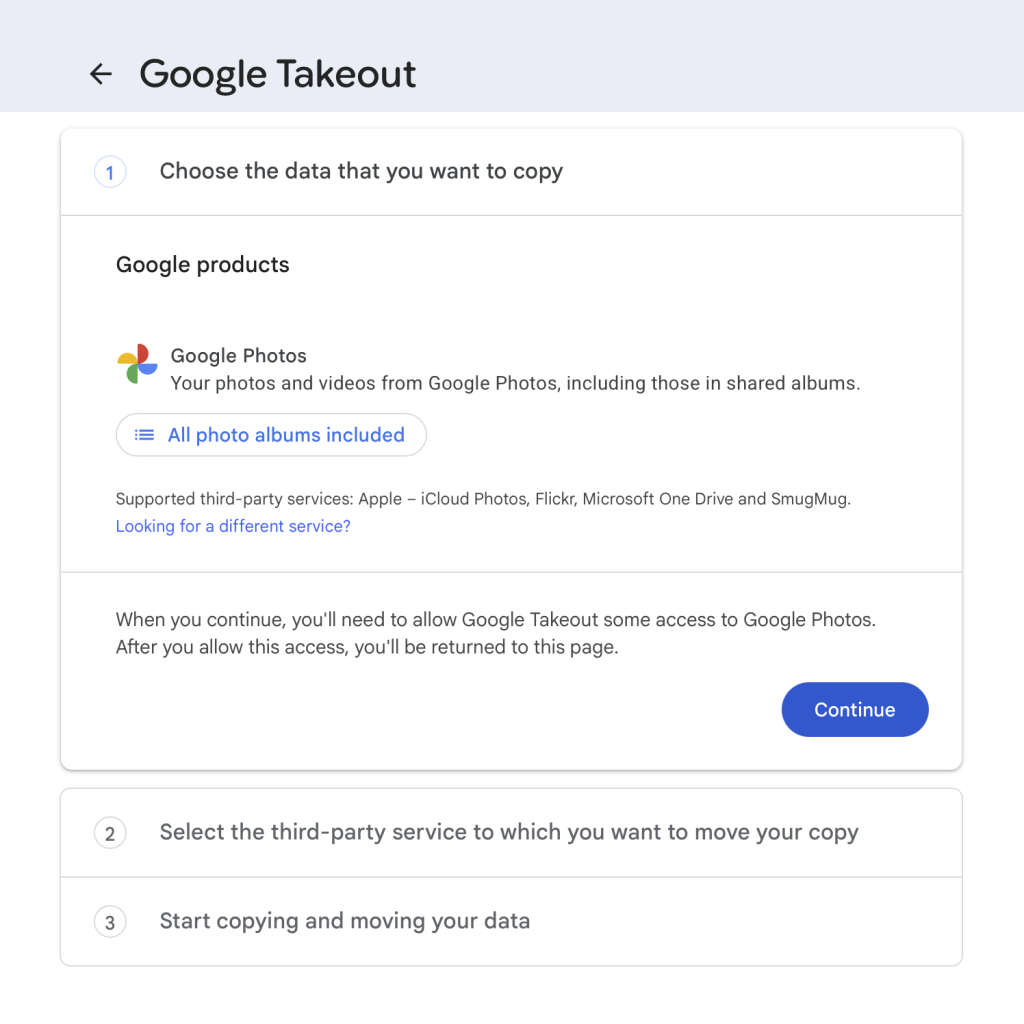
    1. On a Mac, iPad, or iPhone, open Google’s transfer page: https://takeout.google.com/takeout/transfer/custom/photos.
    2. Sign in to the Google account that contains the Google Photos library.
       
    3. Under the Google Photos selection, choose whether to transfer all albums or open All photo albums included and untick any albums you do not want.
    4. In the Move to or destination menu, select Apple – iCloud Photos.
    5. Select Continue.
    6. Sign in to the Apple Account that owns your target iCloud Photos library.
    7. When Apple asks for authorisation, select Allow so Google can add the photos and videos to iCloud Photos.
    8. Read the confirmation screen, then select Agree and continue to submit the request. Apple will email the addresses associated with your Apple Account when the request begins and when the import completes.

    Check the imported library

    The job may take from several hours to several days, depending on the library size. Once it has completed, look in Apple Photos for an album named Import from Google, dated for the transfer; check that a sensible selection of early, recent, edited, and video files are present before treating iCloud as your only copy.

    If expected items are not in Photos, look in iCloud Drive for an Import from Google folder bearing the transfer date. Apple says that unsupported items, including RAW files, are placed there rather than imported into iCloud Photos.

    Important limitations

    • The transfer copies rather than moves your media: it does not remove the Google Photos versions.
    • JPEG, HEIC, PNG, GIF, TIFF and BMP images, plus most MP4 and MOV videos, can transfer to iCloud Photos; Google-exported RAW files go to iCloud Drive instead.
    • Basic associated metadata, including filename, description, type and location, transfers with the original media file.
    • Do not turn off iCloud Photos while it is running: Apple says this stops the import, and you would need to re-enable it and submit a new request for the remainder.
  • A new MacMini 4 Pro for LrC – some lessons learnt, and an issue resolved.

    So … I did succumb, and I did purchase the Mac mini 4 Pro with 24Gb RAM and 500Gb internal SSD, and the Satechi Mac mini M4 Stand & Hub with SSD Enclosure with 2Tb of NVMe SSD storage which I liked the look of in the previous post

    What have I learnt, what could I have done differently – if anything?

    I’m pleased I purchased the Mac mini 4 Pro, I got a remarkably good discount on it (c.£300 from Amazon (breaking a golden rule), and was able to pay for it over 4 months at 0% interest. A good buy. The processor just swallows up anything and everything I throw at it, and with the 24Gb RAM, I believe I’ll be future proofed for quite a few years!

    The SSD both internal and external (in the hub) however has caused some issues and consternation, which initially caused me to think I should have gone for a much larger internal SSD, but thankfully (as explained below) I’m now quite relaxed about that decision and 500Gb is definitely sufficient for my needs.

    The Satechi Hub is not a Thunderbolt hub, and if I’d been prepared to wait (or pay a lot more for one that was not so aesthetically pleasing), the connection between the Hub and the Mac mini could have been faster – but to be honest the data transfer rate using the USB-C 3.2 Gen 2 (up to 10Gbps) has not proven to be a problem. The 2Tb Crucial NVMe SSD storage in the Hub is not being used intensively and so data transfer rate has not been a problem. The ports on the front of the Hub are all in use to serve music, movies and other stored media, and the SD-UHS-II card slot has been well used to import images from my camera.

    The Mac mini’s Three Thunderbolt 5 ports are connected to the Hub, an external G’Drive SSD drive for Images, and a connection to two external G’Drive HD Time Machine and Carbon Copy Cloning drives. The Headphone jack connected to a pair of Logitech powered speakers. Magic!!!

    [PS I treated myself to a Pioneer Blu-Ray Player as well because my old SuperDrive was not working with the new Mac mini hardware.]

    Did I learn anything from the purchase? Well, yes – but it was nothing to do with the hardware!!

    As I was editing images in Lightroom Classic, I discovered that I couldn’t save a Catalog Backup to a folder on my iCloud Drive. There was plenty of space for the file, so what could be going on?

    It took me a couple of days to get to the bottom of the problem, and one that was quite unexpected.

    The problem was that the System Data on my internal drive was growing to a ridiculous size, to the extent that there was not enough space on the Internal Drive of the Mac mini to do the save to the iCloud Drive. So, a couple of things had to be addressed. Why was the System Data growing so large, and should I review where some of my Lightroom files were being stored. This was the first thing to be considered.

    I moved the Lightroom Classic Catalog Backups folder from the iCloud Drive to the external SSD drive in the Hub, I also reviewed all the other peripheral files and folders that Lightroom was using and either moved them to the Internal SSD on the Mac mini, or to the External SSD in the Hub.

    The folders on the external SSD in the Hub – none of these require “fast” access and so are “happy” to sit on an external drive with data transfer rates still at up to 10Gbps.

    These folders are located on the internal SSD of the Mac mini and are ones which could benefit from the fastest data transfer rates.

    It is also important to make sure you’ve changed all the preferences in Lightroom Classic to match the “new” configuration …

    So that’s got Lightroom Classic sorted to give me the best performance on the new kit, but still I had an issue with System Data in General > Storage on the Mac mini. For a while I thought “shall I just upgrade to Tahoe (from Sequoia) and perhaps it’ll go away, but having upgraded my Mac Book Pro to Tahoe I was astonished to see that even with 2Tb of Internal SSD storage, System Data was eating as much it could of that storage. Obviously something wasn’t right.

    The solution which I discovered eventually after extensive use of Perplexity was counter-intuitive and one that I would never have worked out.

    I needed to switch-off synchronising of my Desktop and Documents Folders – this meant some re-organisation of file store which was in itself long overdue, and then switch on Optimise Mac Storage!!!

    Surprisingly System Data will gobble-up local disk storage if you switch this off. Switching it on gets everything back into a sensible state of order.

    So … I applied these settings to both the Mac mini and the MacBook Pro (even though it had loads of Internal SSD space), and System Data shrunk on both systems to a manageable level.

    Who’d have known that! Thanks Perplexity.

    [Addendum: After upgrading the Mac mini 4 to Tahoe this morning (15/12/2025) the System Data shrank again to c.67Gb – this was also recommended in the Perplexity threads as a “if the above doesn’t work … try a re-install”]