

An interesting question, and one that I’ve looked at more than once, and written about in another place …
Travelling with my camera and without my MacBook Pro [Updated]
… so you can see that I’ve considered what would be the best way for me to travel with LrC. What do I now consider the best way to take LrC with me when I’m on my travels. There are a number of alternative strategies, so there is no “best” way, just the way that matches best the way you want to work. Lightroom Queen and The Missing FAQ is a good place to validate any of the suggestions below, but as far as I can tell this list, partly assisted by a query to Perplexity is comprehensive.
Method 1. Use the Lightroom app on your laptop, part of your Adobe Photography Plan subscription, and synchronise to the cloud and then again to your main machine when you return home. This is by far the easiest solution and works as long as you don’t use up all of the 20GB cloud storage Adobe give you as part of the Plan. BUT … you do need to remember to delete the images when you’ve transferred them to your main machine – you can do this from the Lightroom app on your travel laptop, or from https://adobe.lightroom.com
This web interface to Lightroom is quite possibly the least used one, but it it is very useful for the single purpose of clearing your cloud storage. Just remember however – you delete the images after the synchronisation from the cloud to your main LrC catalog has completed, and you’ve moved your images within LrC to the folders you want them to be in, from the Synchronisation Folder that you’ve created to receive the images from the cloud. More about this in the article cited above.
Method 2. You deploy a SSD like this one [click on image for further information] …

… to store a specific Trip Catalog with images taken so that you remain within the LrC application all the time. No additional interfaces to learn, just a relatively simple setup and refinement of workflow on your return. For this to be your solution of choice, you need to ask yourself – “Do I need access to my main catalog when I’m away from home, and most importantly – do I need to edit any images in my main catalog when I’m away from home.” If as I suspect (and certainly in my case) you don’t need to access your main catalog then this is the solution for you – and it reduces the weight you need to carry as well.
For this to work well, before you leave home, you need to setup the SSD with a file structure exactly the same as on your main machine and you need to create a NEW catalog on the SSD specifically for the Trip.
When you return from the trip, you open your main catalog and select Import from Another Catalog …
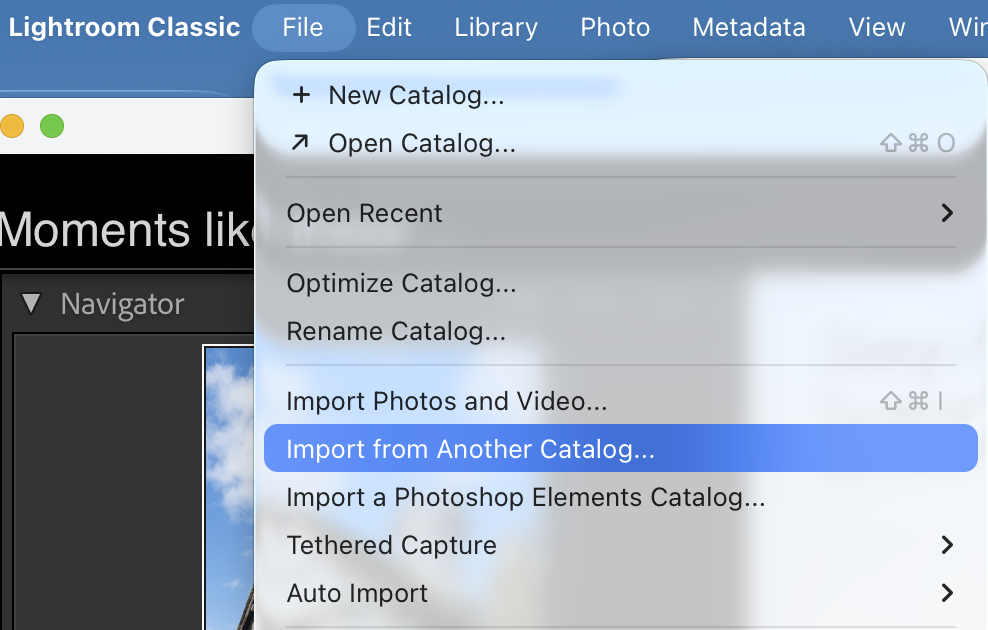
… if you’ve setup the SSD correctly the images will then transfer into their permanent home.
[NB It would be a good idea to test the setup before you leave home, so try importing some test shots into the SSD catalog, and doing a test Import]
A step by step guide to doing this (from Perplexity) is included as Appendix 1 below.
Method 3. This involves taking your existing SSD which holds all your images with you on your travels. [Do you really want to do this??? If you want to take images to show’n’tell it might be safer and kinder to your back to upload them to Google Photos and let them travel in the cloud!!] Perplexity shows how this can be done with a number of alternatives.
Alternative 1. Catalog and photos on same external SSD
The cleanest setup is to put both the catalog and the photos on a fast external SSD and use that single drive with both machine, so you’re always using the same catalog and never have to merge or sync later. [However, this will slow down response to the catalog when working on main machine. This is the way I used to work, but I changed to using Method 2.]
Goal: one external SSD that contains:
- The main Lightroom Classic catalog (.lrcat and its previews)
- All original photos (existing and new)
That external drive is then:
- Plugged into Laptop 1 at home
- Plugged into Laptop 2 when travelling
- Opened with the same catalog file on both machines
This avoids all “import from another catalog”, XMP sidecars, manual sync, etc. Everything just follows the drive. A Step by Step guide to setting this up (from Perplexity) is included as Appendix 2 at the bottom of this post.
NB Backups and safety
With a portable library drive, backups are critical:
Never travel with the SSD as the only copy; ideally keep another copy at home.
Enable catalog backups in LrC and set the backup location to a different drive (e.g. each laptop’s internal disk or a second backup disk), not the travel SSD itself.
Back up the Photos folder on the SSD using Time Machine, cloning software, or another external drive.
Alternative 2: catalog on laptop, photos on external
If you’re worried about the catalog on an external drive disconnecting mid‑write (a small but real risk), another common pattern is:
- Photos on the external SSD (shared between laptops)
- Catalog on each laptop’s internal disk
However, this requires:
- Either import/export catalog when moving work between laptops, or
- Deciding that only one laptop is the “master” and the other is just for temporary travel catalogs that are merged later via “Import from Another Catalog”.
That’s more admin but can be a bit safer from a catalog‑corruption perspective. It sort of gets close to the suggested preferred Method 2 (above).
Appendix 1.
Overall idea
- Home machine
- Contains the main Lightroom Classic catalog and the long‑term photo storage.
- Travel laptop
- Uses a temporary catalog for the trip only.
- Stores RAWs either on its internal SSD or on a dedicated “travel photos” external drive (or SSD) during the trip.
- After the trip
- Use File → Import from Another Catalog on the home laptop to pull in all new images and edits from the trip catalog.
This way:
- The main catalog never leaves the home machine.
- All culling, rating, edits applied on the trip are preserved when merged.
Before the trip (one‑time prep)
On the home machine (with the master catalog):
- Make sure the folder structure and backup strategy are solid (master catalog and photos clearly organised and backed up).
- Decide where trip photos will end up long‑term (e.g. into a dated structure on a photo drive). He’ll need that when he imports the trip catalog later.
On the travel laptop:
- Install Lightroom Classic (ideally same major version as home laptop).
- Decide where to keep travel images:
- Either on the laptop’s internal SSD, or
- On a small external SSD dedicated to travel (good for capacity and backup).
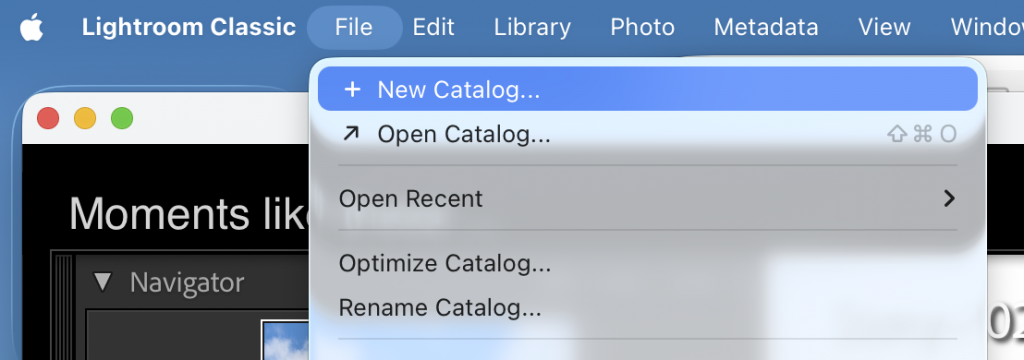
- In LrC on the travel laptop, create a new catalog for the trip:
- File → New Catalog.
- Name it something like
Italy_2026and save it in a folder likePictures/Lightroom/Italy_2026/on the travel laptop or on the travel SSD.
That catalog folder will contain:
Italy_2026.lrcatItaly_2026 Previews.lrdata- Possibly
Smart Previews.lrdata(if you build them)
During the trip
On the travel laptop:
- Always work in the trip catalog (e.g.
Italy_2026.lrcat). - Import cards into LrC with photos going either:
- To a trip folder on the laptop (e.g.
Pictures/Trips/Italy_2026/), or - To
Trips/Italy_2026/on the travel SSD.
- To a trip folder on the laptop (e.g.
- Do normal work:
- Cull, rate, flag.
- Apply develop edits, presets, crops, local adjustments.
- Add basic keywords, collections, etc.
- Have a backup routine while travelling:
No syncing with the home catalog happens while travelling; you just work in the trip catalog.
When you return home
Goal: bring the whole trip into the master catalog on the home machine, including all edits and metadata.
1. Move the trip catalog and photos to the home system
Pick one of these:
- If the photos and catalog are on a travel SSD
- Plug the SSD into the home laptop.
- Make sure you can see the trip folder structure and the
Italy_2026.lrcatfile.
- If everything is on the travel laptop’s internal SSD
- Copy the entire trip folder (containing the catalog and its photo folders) to an external drive, then copy that to the home machine, or directly into the home photo drive.
Key point: keep the folder structure intact – don’t separate photos from their trip catalog yet.
2. Import from the trip catalog into the master catalog
On the home machine:
- Open the master catalog.
- Go to File → Import from Another Catalog….
- Navigate to the trip catalog file, e.g.
Italy_2026.lrcat, and choose it. - In the import dialog:
- Make sure All folders are selected (unless you want to exclude some).
- Under File Handling, choose:
- Copy new photos to a new location and import – then choose the permanent photo location in the main library (e.g. the usual dated folder structure on the main photo drive), or
- Add new photos to catalog without moving – if you want to keep them exactly where they are on a photo drive that’s already part of the long‑term storage.
- Click Import and let Lightroom:
- Copy/move the RAW files to the chosen main‑library location (if you selected copy/move), and
- Bring in all metadata, flags, ratings, edits, virtual copies, collections, etc. from the trip catalog.
Now those images are fully part of the master catalog, as if they’d always been imported there.
3. Clean up after merging
Once you have confirmed that:
- All trip images are visible in the master catalog, and
- The files are in the expected folders and backed up,
you can:
- Optionally archive or delete the trip catalog folder (
Italy_2026.lrcatand its previews) from the laptop/SSD, keeping it only if you want a belt‑and‑braces backup. - Free up space on the travel laptop by removing the local copy of the RAWs (as long as the master library and its backups look good).
Appendix 2.
Step‑by‑step setup for Catalog and photos on same external SSD
Assuming your current situation is:
- Machine A (heavier laptop), or desktop: LrC catalog on internal disk, photos on external drive X
- Laptop B (lighter): LrC installed, but no catalog yet
1. Choose and prepare the travel drive
- Get a fast external SSD (e.g. 1–2 TB, USB‑C/Thunderbolt).
- Format it in a compatible file system both machines can read/write (APFS if both Macs; exFAT if any Windows involved).
On that drive create two top‑level folders, e.g.:
textLightroom Library/
  Lightroom Catalog/
  Photos/
2. Move the photos onto the new SSD (if needed)
If your existing images are already on a suitable external SSD and you’re happy to keep using that as the travel drive, you can skip this move and just standardise the folder layout.
Otherwise:
- From Machine A, copy the existing photo folders from the current external drive to
Photos/on the new SSD using Finder/Explorer. - When done, in the old catalog on Machine A, use Library > Find Missing Folder / Update Folder Location to point Lightroom to the new drive location so the existing catalog now sees the photos on the new SSD.
At this point:
- Old catalog (still on Machine A’s internal disk)
- Photos now on the new travel SSD (
Photos/)
3. Move the catalog to the SSD
From Laptop A:
- Quit Lightroom Classic.
- Find the current catalog folder (the
.lrcatfile plus thePreviews.lrdataandSmart Previews.lrdata). - Move that entire catalog folder to
Lightroom Library/Lightroom Catalog/on the SSD. - Double‑click the
.lrcatfile on the SSD to open it. Lightroom will now run that catalog from the external drive. - In Preferences → General, set “When starting up, use this catalog” to this catalog, if desired, so it becomes the default on each machine.
Now:
- Catalog and previews live on the SSD
- Photos live on the SSD
- Machine A is using the SSD catalog
4. Connect and use with Laptop B (travel laptop)
On Laptop B:
- Install the same Lightroom Classic version (or as close as possible).
- Plug in the SSD.
- Double‑click the same
.lrcatfile on the SSD (Lightroom Library/Lightroom Catalog/...).
The catalog will open and should show all the same folders and photos because the drive path and structure are identical.
From now on, you always:
- Connect the SSD
- Start Lightroom by opening that
.lrcat - Imports new photos directly to
Photos/on the SSD (set the Destination on import to the SSD), whether at home or travelling


