A short (I hope) note on where media (and text messages) are stored on WhatsApp and Signal, how to backup and restore messages, and how to “get rid” of them – mainly to save space on your phone. I’m going to rely on the links referred to in the post, rather than repeat their contents, so click on the relevant ones.
First, some important points to remember.
The primary device for both apps is the device that your phone number was registered with. Any other device that you access messages from the service are synchronised with the primary device (usually a phone). It follows from this that you should always think of both WhatsApp and Signal as mobile apps, not tablet or desktop applications.
If you lose your phone, or change your phone without backing it up in the app first, you will lose your message store, and all the media attached to messages. They will not be accessible from your tablet, or desktop, applications because the link for synchronisation will be broken.
This is because … NO MESSAGES OR MEDIA ARE STORED ON A SERVER – really, you must believe me!
All media that’s downloaded in WhatsApp will be (by default) saved to your Gallery (Android) or Camera Roll [Photos app] (iOS). This is not the case for Signal (see below).
For Android devices, if you want to switch this off, you should read this article. Media files are automatically saved in your WhatsApp/Media/folder. If you have Internal Storage, the WhatsApp folder is located in your Internal Storage. If you do not have internal storage, the folder will be on your SD Card or External SD Card.
For iOS devices, in the same vein, this article may be helpful if you don’t want WhatsApp to store media to your Camera Roll [Photos app].
It follows from the above that if you delete media inside WhatsApp and you haven’t changed the default settings, the media should still be in the Gallery, or Camera Roll of your device. [NB I haven’t checked this out because I no longer use WhatsApp.]
If you want to backup your WhatsApp message store, you can refer to this article to find out how to do it for Android and iOS devices, and for PCs (for downloaded media only).
The situation with iOS for Signal is different from that with Android when it comes to Downloading images. Signal does not save media to your Gallery or Camera Roll [Photos app]. If you want to manage the auto download of media to the app, you should read this article first which covers the situation well for Android users, but will need to have a look at this article to see how to switch-off automatic downloads into the app for iOS users. I’m not going to recommend this as a way forward for iOS. Stick to the default and only store the downloaded media in the app.
If you want to Backup or Restore your Signal message store, you are advised to carefully read this article which applies to Android and iOS devices.
Now some notes on deletion of media.
It follows from the note above on media saved outside the app that if you delete in the app, the media will still be in the Gallery or Camera Roll. If you delete in the Gallery, the media should still be in the app.
Deletion of a message from a Chat will delete the media attached to it, but will not delete the chat, or the media, from any recipients of any message you’ve sent – unless you’ve put an “automatic delete after”setting on the message (Signal only, I believe).
Thus, following from above, if a chat recipient replies to a message you’ve deleted, you may see a thumbnail of the media attached to the original message, in the reply.
For iOS users, to delete media from within WhatsApp chats you should read this article. For Android users, this article should help you.
For iOS and Android users, to delete media from within Signal chats you should read this article, save any media you want, select the items for deletion and press the trash icon.
Finally, and I hope you’ve got this far, I think this link summarises the situation really well for our preferred solution – Signal. Media is stored in the app, you have the option manually to save selected images to Gallery or Camera Roll [Photos app], thus saving on storage space and gaining additional security along the way too.
Phew! That’s taken a good deal longer than I expected it would.
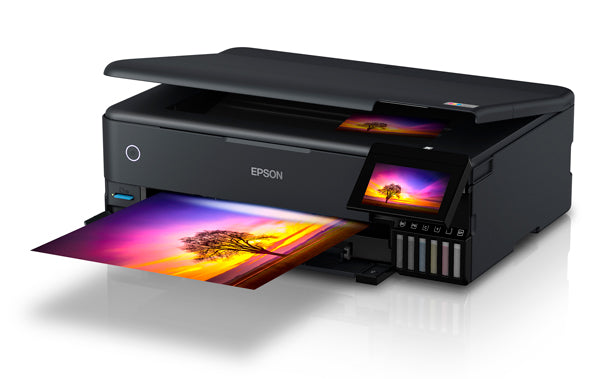
After years of thinking “should I”, I’ve taken my first steps into seriously thinking about printing some of my photographs. Until now I’ve “got by” with printing some images out on my HP Color LaserJet CP1515n, but it’s getting older, and the cost of replacement cartridges is getting more and more expensive, and the images although satisfactory are not ones I’d frame and put on the wall. So I took the plunge and decided after doing a lot of research that I would get an Epson EcoTank ET-8550. What this post seeks to do is to cement in my mind what I have learnt about printing from Lightroom to this new printer. [I accept this might not be the best workflow to use, but it’s the one I want to start with.]
Along the way I’ve learnt a little about Soft Proofing (but have often been thwarted in my rather pathetic attempts to understand how it works – I think I do now), grappled a little with Color Management (but am still left with a high degree of uncertainty), and struggled with ICC Profiles. However, I’ve found a very helpful website – Northlight Images run by Keith Cooper – and that site and Keith (who’s been very helpful) will be a very valuable resource to help me on my journey. But first things first. To start with the problem … and work towards a solution [maybe not the best one, but one to get me going … I expect to re-visit this post on more than one occasion].
Misconception: I’d set my Color Space in my camera to Adobe RGB thinking that it was important to have a consistent color space through my workflow. Wrong. This is only of significance if I’m shooting in JPEG; I’m not, I’m using Uncompressed RAW + JPEG. In fact the significance of my misconception only struck home when I searched for the Color Space in the EXIF settings of an image and found it was missing, and then I realised (a bit like Profiles and White Balance), that when shooting in RAW these are all changeable in post-processing.
Duh!
So … Don’t worry about the camera settings when you’re considering printing, unless you’re going to shoot solely using JPEG.
I’ve imported the images into Lightroom Classic, what’s the next thing I should consider? Well … getting the MacBook Pro (2021 M1) and external Benq monitor displaying the same colours would be a good start! One of the reasons I chose the Benq PD2725U (apart from the fact it’s a really good monitor) was that it had a dedicated M-book Color mode, so after selecting that as the Color mode and setting the Display Brightness on the MacBook Pro to 50:50 and changing the Brightness and Contrast of the Benq monitor to 50% I got a good match between the monitor and laptop.
I’m beginning to think I’m “cooking with gas” (note to self, that phrase will have to change).
System Preferences for MacBook Pro mirroring to BenQ monitor
So that’s got the screen appearance correct.
Do I need to consider the Color Space I use then in Lightroom?
No … Lightroom uses ProPhoto RGB internally and color space is only of importance when you export out of Lightroom where you have the choice of one of three [with acknowledgement to Digital Photography School – text in italics below] …
ProPhotoRGB: ProPhoto RGB is the largest of the three. It roughly matches the range of colours that a digital camera sensor can capture.
Adobe RGB (1998): Adobe RGB (1998) is smaller than ProPhoto RGB, but larger than the next choice, sRGB. It roughly matches the colour gamut of CMYK printers used to print books and magazines.
sRGB: sRGB is the smallest colour space of the three. It represents the colour space that most monitors are able to display.
So, attempting to things as simple as possible, this is how they should be used when you’re exporting images out of Lightroom …
sRGB: Use when exporting photos to be displayed online, printed at most commercial labs, or printed with most inkjet printers. In short, if in doubt, use sRGB.
Note: Lightroom’s Web module automatically sets the colour space of exported files to sRGB.
Adobe RGB (1998): Use only if requested. If you’re not sure, ask. If you’ve been asked to submit photos to a magazine, for example, then ask them which colour space is required. It will probably be Adobe RGB (1998). Submitting photos to a stock library? Again, it will probably be Adobe RGB (1998). It’s the colour space most likely to be used for commercial purposes.
You would also use this colour space if you have an inkjet printer that utilizes the Adobe RGB (1998) colour space, or you are using a lab that accepts and prints photos with that profile.
ProPhoto RGB: Use when exporting a photo file to be edited in another program such as Photoshop or a plug-in. The file should be exported as a 16-bit TIFF or PSD file. There is little point in using the ProPhoto RGB colour space with 8 bit files, as they don’t contain enough bit depth to utilize the full colour range.
Note: If you import a JPEG or TIFF file into Lightroom, it uses the file’s embedded colour profile. If there is no colour profile attached, it assumes that it’s an sRGB file. If you choose an alternate colour space when you export the file, Lightroom converts it.
But I want to Print, not Export, my images. This is where we have to move to looking at Printer Profiles, the delights of Smart Proofing in the Develop Module, and of course how we use the Print Module in Lightroom.
To do this you work from the Paper and the Ink, used on a Printer, through a Profile, back to the Software – Lightroom. So the starting point is what is called an ICC Printer Profile. Prints are calibrated for the paper and ink on different printers to produce these profiles. It is possible to do the calibration yourself, but that’s a step far too far for me. I’ll stick to paper that has a profile already provided for the printer I have. Simples!!!
I had terrible difficulty in finding/obtaining the ICC Printer Profiles for Epson Paper on my Ecotank ET-8550. Eventually, with a little assistance from Epson (who were struggling to find a solution to the problem), we stumbled upon the answer, which I submitted to The Lightroom Queen forum for Lightroom Classic, and which I reproduce below …
Lightroom VersionLightroom Classic version: 11.2. Operating System macOS 12 Monterey
A solution to a problem/issue, not a query, but one that needs recording and hopefully will help reduce the stress of others. This has bugged me for several weeks!!!
The ICC profiles for Epson appear to be installed in System/Library/Printers/Epson, not in Users/myuserid/Library/ etc.
However, and this is the crucial thing, you do need to do an additional step when installing the software on Monterey (apparently). [This I got from Epson Technical Support.]
1. Goto Systems Preferences … > Printers & Scanners
2. Press ‘+’ and select your Printer …
3. Click in the Use pull-down box and Click on Select Software …
4. Select your printer (the ET-8550) again, and press OK
This will create a seemingly duplicate version of your printer. Delete the old one and all should now be well. The profiles should now appear in the Print Module and in Smart Proofing, and in ColorSync which they don’t after an initial install.
[ColorSync is an Apple Utility that enables you to see (and repair) Profiles installed on your computer. Before I did the steps described above, I couldn’t see any Epson ICC profiles installed on my machine. This video was also of some considerable help in pointing me towards a solution.]
I’m not going to cover Smart Proofing in this post which you can employ using the ICC Profile for the Paper/Printer that you’re using, simulating the finished print on the screen against the original image, as it is well treated in the following articles, and a couple of videos …
So … on we move. We’ve got an image that we’ve Soft Proofed in the Develop module and now we move to the Print module to print the Proof copy – a Visual Copy of the original image that we’ve created in the Smart Proofing process in the Develop module.
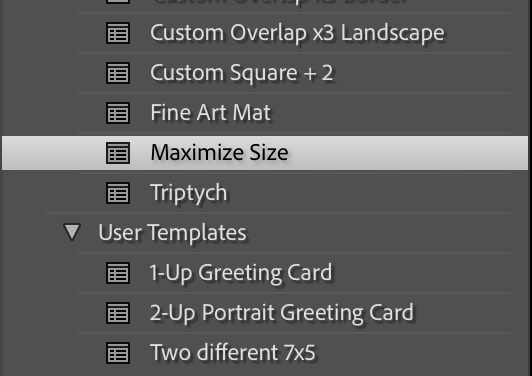
Let’s assume that we just want to print a single image to fill a sheet of paper. You need to select Maximise Size in the Template Browser on the left-hand side of the screen.
Moving to the right-hand side of the screen you set the print up the way you want it to appear (I’m not discussing the details of that here). You move to the Print Job panel …
… making sure that you have chosen the same Profile and settings as you used in Smart Proofing.
Next you need to select the Paper Size for your chosen printer and the orientation of the image from the button in the bottom left-hand side of the screen …
You then move to the Printer button in the bottom right-hand side of the screen …
Preset for Epson Premium Semi-Gloss A4 Borderless saved
… and hopefully chose a Preset you’ve previously created for the printer and paper, or create a new one going successively through Layout (as above), Colour Matching …
No Colour Matching as we’re using a ICC Profile
… Paper Handling …
… and finally Print Settings (just to check things are the way you expect them to be) …
… and then you click on Print, and your printer should whirr into action.